Applications with PI
There are many, way too many things you can do with a Rapberry Pi. After all, it is a computer, a full fledged linux computer with GPIOs. Following are some essential tools or applications with this credit-card size computer. There are a lot more, and I will post them later. This is done with Arch Linux, it should be applicable to other systems though.
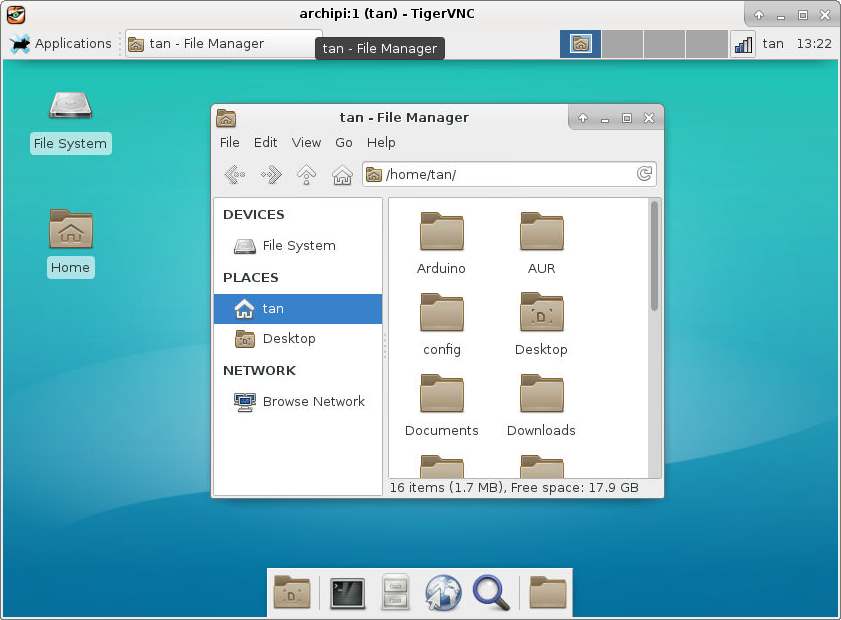
Setting up VNC [virtual network computing]
Remote desktop comes in very handy with Raspberry Pi. You’d like to have it even when you are local to it, especially if you want to set it up as a headless box. VNC will be the ideal option to do so.
-
installation
1234pacman -S tigervncvncserver #type in passwordThis packages provides the requisite vncserver, x0vncserver and also vncviewer. Vncserver provides two major remote control abilities:
- Virtual (headless) server which is similar to the standard X server, but has a virtual screen rather than a physical one. The virtual server runs completely parallel to the physical X server should one be running. –>vncserver
- Direct control of the local X session(s) which do run on the physical monitor. –>x0vncserver
running headless control
-
retrieve IP address of your PI -your server in this case
123ip addr - access your PI from another issue with your vnc client from another PC, smart phone or Chrome VNCviewer
-
On the server side -your pi
1234vncserver:1 #from 5901 port, OR the followingvncserver -geometry 1440x900 -alwaysshared -dpi 96 :1input password when asked, or change later with vncpasswd
-
On the client side
123vncviewer localhost::8900 or ip, OR fill in the GUI -
Starting and stopping vncserver at bootup and shutdown via systemd Create /etc/systemd/system/vncserver@:1.service and modify it defining the user to run the server. Use this with systemd to manage it. Here is the file origin [/lib/systemd/system/vncserver@.service]
12345678910111213141516171819202122232425262728293031323334# The vncserver service unit file# The vncserver service unit file## 1. Copy this file to /etc/systemd/system/vncserver@:<display>.service# 2. Edit User=# ("User=foo")# 3. Edit and vncserver parameters appropriately# ("/usr/bin/vncserver %i -arg1 -arg2 -argn")# 4. Run `systemctl daemon-reload`# 5. Run `systemctl enable vncserver@:<display>.service`## DO NOT RUN THIS SERVICE if your local area network is untrusted!## See the wiki page for more on security# https://wiki.archlinux.org/index.php/Vncserver[Unit]Description=Remote desktop service (VNC)After=syslog.target network.target[Service]Type=simpleUser=PAMName=login# Clean any existing files in /tmp/.X11-unix environmentExecStartPre=/bin/sh -c '/usr/bin/vncserver -kill %i > /dev/null 2>&1 || :'ExecStart=/usr/bin/vncserver -geometry 1440x900 -fg -alwaysshared -dpi 100 %iExecStop=/usr/bin/vncserver -kill %i[Install]WantedBy=multi-user.target -
The screen capture.

- In Debian system, follow instruction here.
Running vncserver to directly control the local display
-
invoke like this
123$ x0vncserver -display :0 -passwordfile ~/.vnc/passwdNote: use passwd to change or set password
-
Starting and stopping x0vncserver via systemd Note: This unit will only be useful if the user in the unit is currently running a X session. In order to have a VNC Server runnning x0vncserver, which is the easiest way for most users to quickly have remote access to the current desktop, you can create a systemd unit. Create /etc/systemd/system/x0vncserver.service and modify it defining the user to run the server, and the desired options. /etc/systemd/system/x0vncserver.service
12345678910111213[Unit]Description=Remote desktop service (VNC)After=syslog.target network.target[Service]Type=forkingUser=fooExecStart=/usr/bin/sh -c '/usr/bin/x0vncserver -display :0 -rfbport 5900 -passwordfile /home/foo/.vnc/passwd &'[Install]WantedBy=multi-user.target
webcam with USB webcam
-
install fswebcam
12345yaourt -S fswebcamfswebcam test.jpg --skip 1 test.jpgfswebcam --loop 2 --background --skip 1 test.jpg -
start server with python3
123python3 -m http.server 8000 - browse from another website 192.168.1.2:8000
Network bridging to share a laptop screen and keyboard with Raspberry PI
The preamble
The concept is to share your laptop keyboard and screen with Raspberry PI with xforwarding or VNC via network bridging. All you need is an ethernet cable (crossover is not necessary for most cases). Both systems can share your laptop wireless internet.
setting xforwarding with ssh -X or ssh -Y
This does not belong here, but it is really cool stuff. Mosh is cooler, but does not work with x-forwarding yet.
-
make changes to /etc/ssh/sshd_config [NOT ssh_config] by un-commenting following lines
12345X11Forwarding yesX11DisplayOffset 10X11UseLocalhost yesNote make changes to ssh_config will disable sshd connection
-
restart sshd and checking status
1234sudo systemctl restart sshdsudo systemctl status sshd -
ssh -X from another computer
123ssh -X user@ipand, start any gui application,
- Some notes from my side:
- only terminal needed from host side
- on client side, Xlib RAND and SYNC warning shows up, but works regardless, possible solution here.
- use ssh -Y without any warning
set up network bridging
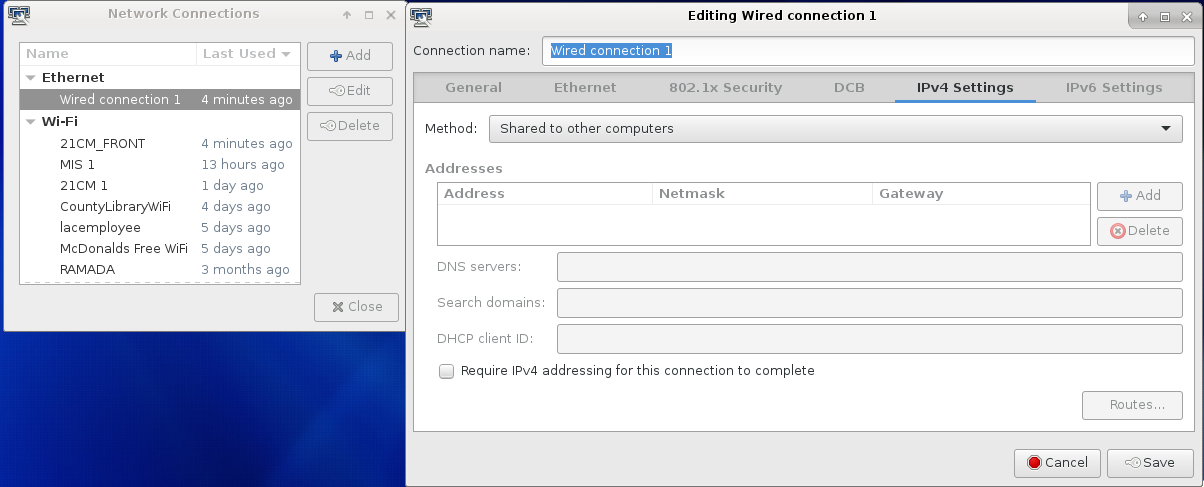
Followed up the instruction here, does not really work. stopped at brctl addif bridgename eth0, did not get a chance to figure out why. what worked for me is using network manager, and set as as following from your linux PC.

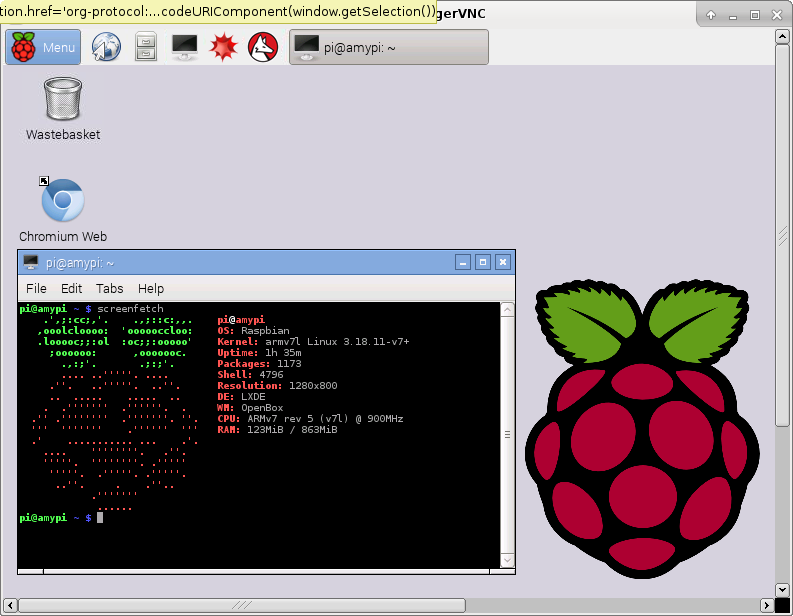
Notes: Above worked fine with Rasbian too; VNC and ssh both worked fine with me.
 https://www.google.com/search?q=science+news&ie=utf-8&oe=utf-8#q=science+news&start=10 Procedures:
- start up Raspberry Pi and Laptop running Arch Linux
- Connect RasPI (server) with PC (client) with an ethernet cable.
-
Locate the ip for Raspi from PC -client
123ip neighbour -
The No description for this link way
- SSH to RasPi and turn on VNC server
1234ssh tan@ipvncserver2). vnc or “SSH -X” back to Raspi from laptop
123vncviewer ip:5901 - OR, set up rasPI the No description for this link local display way, and vnc or ssh -X to it
- Fix for no mouse cursor
If no mouse cursor is visible when using x0vncserver, start vncviewer as follows:
|
1 2 3 |
$ vncviewer DotWhenNoCursor=1 <server> |
Or put DotWhenNoCursor=1 in the tigervnc configuration file, which is at ~/.vnc/default.tigervnc by default in your client PC, not rasPi.
OCT

About the Author:
Beyond 8 hours - Computer, Sports, Family...