The Unified Extensible Firmware Interface (UEFI) is a specification that defines a software interface between an operating system and platform firmware. UEFI replaces the Basic Input/Output System (BIOS) firmware interface. With all the advantages, it is appears to be more volatile and fragile for multiple boot system. I found it is easily to lose the bootloading info when you make some changes in bios setting (esp. secure boot) or by disconnect the bios chip battery. I have rendered the system into a dead cycle (turns on for 2 seconds with a blink of keyboard light, shuts down and then restarts again…) simply by switching on the secure boot from bios setting.
Identify the right chips
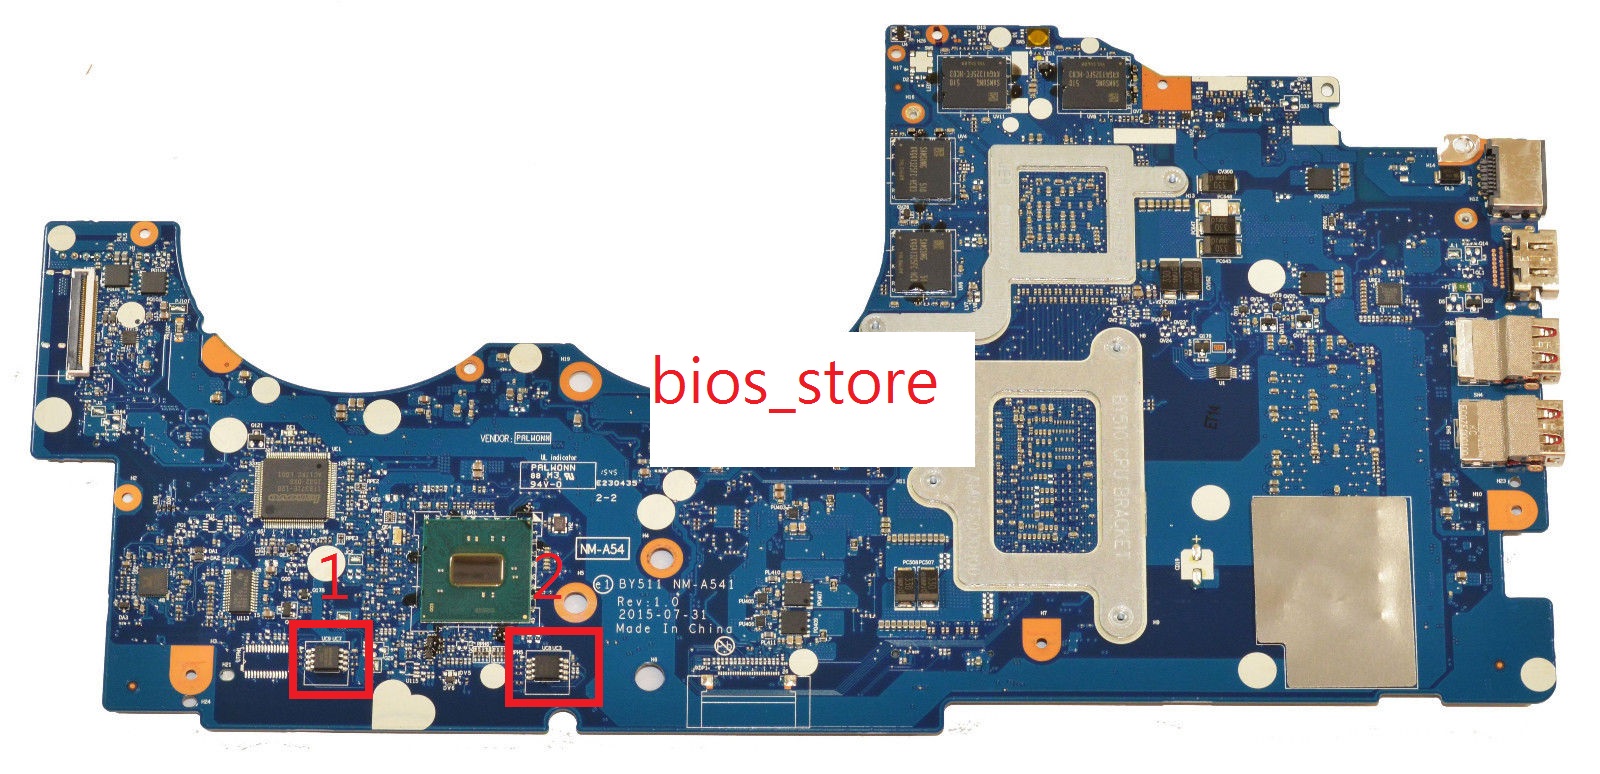
There are 2 bios chips in Lenovo Y700 Motherboard (Lenovo Y700-15isk Laptop). The chip 1 is labeled “~Winbond 25Q32FVSIQ 1532~”, and it is Embedded Controller (EC) Bios. The chip 2 is the system Bios chip labeled “~BH1640 25Q64VS1G PP3671~”, which is also compatible with “ Winbond 25Q64VS1Q”. There is NO need to change the EC bios chip.

Remove the SMD chips
To remove the chips with soldering or hot air gun, follow this good tutorial here. A hot air gun will make the job a lot easier. Apply more solder if using soldering method, and never force the chip off. Apply soldering flux paste or liquid with either method.
If you made the same mistake as I did, in which case I rip the copper pad off the pcb surface, follow the instruction here to glue the copper pad first with epoxy/adhesive suitable for electronics (I used this brand here). If you are not certain or do not have the tools, bring it to a professional. You will need a magnifying tool (ideally a microscope or a good led camera my work), some fine tweezers, and, lots of patience.
Solder the New Chips
One of best video online shows the right way to replace/repair the copper pad for SMD chips. I prefer soldering; others prefer hot air gun.
OCT
About the Author:
Beyond 8 hours - Computer, Sports, Family...